Creating a new bot
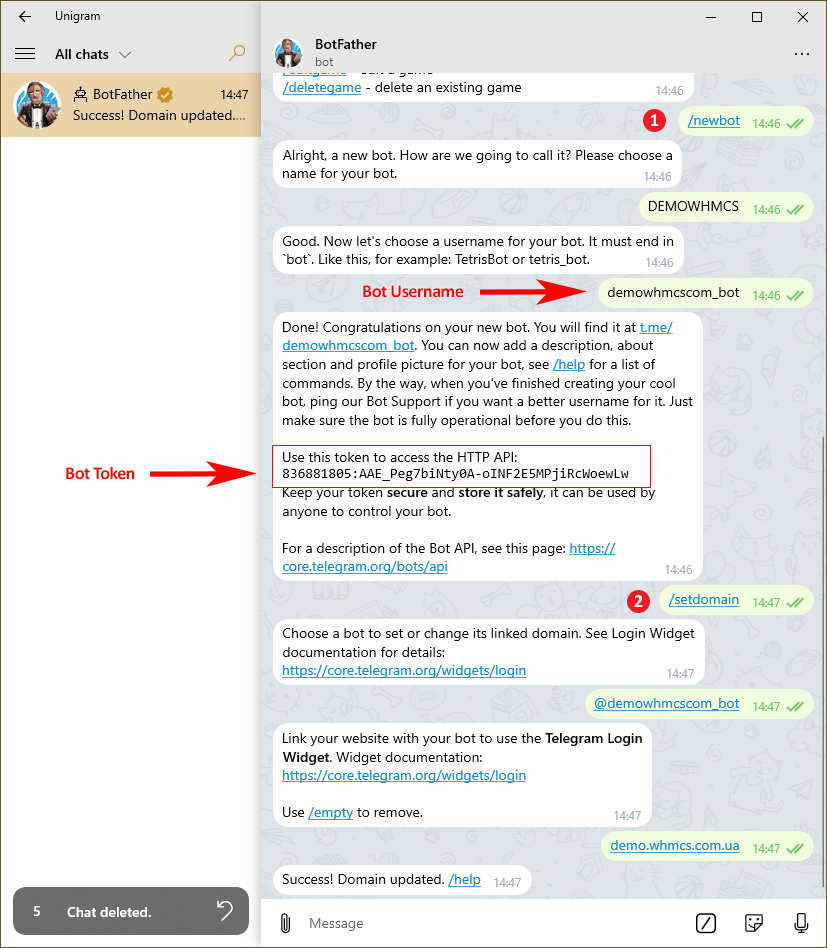
How do I create a bot? Do not forget to set domain with /setdomain command.
Main Addon (Client Notifications)
Install and activate
Download and unpack telegram-addon.zip, upload content to the WHMCS folder.
Go to Setup > Addon Modules and activate Telegram Addon.

After activation check permissions and save settings.
Set Encoded File Loading to Attempt to load all files at General Settings – Other.

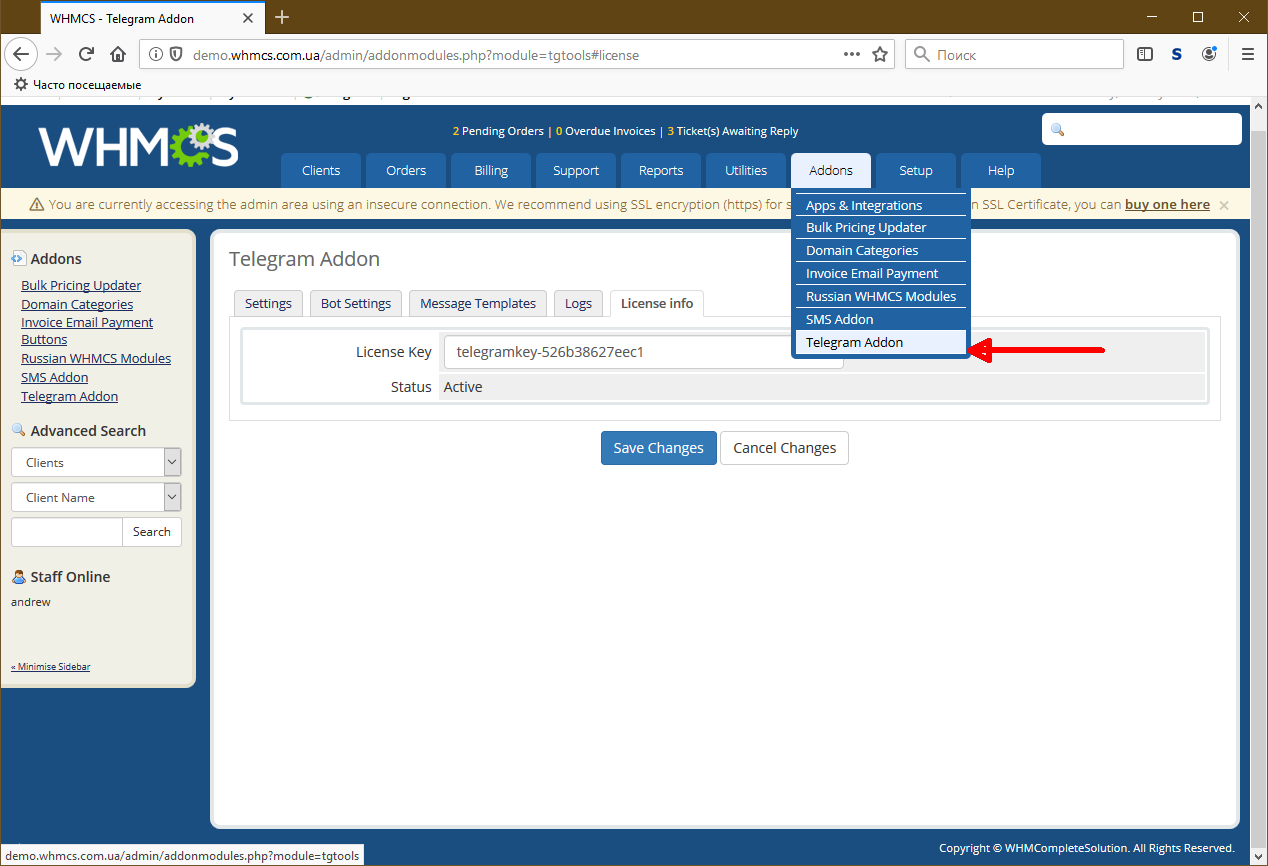
Go to Addons > Telegram Addon and fill the License Key field.
Bot Settings
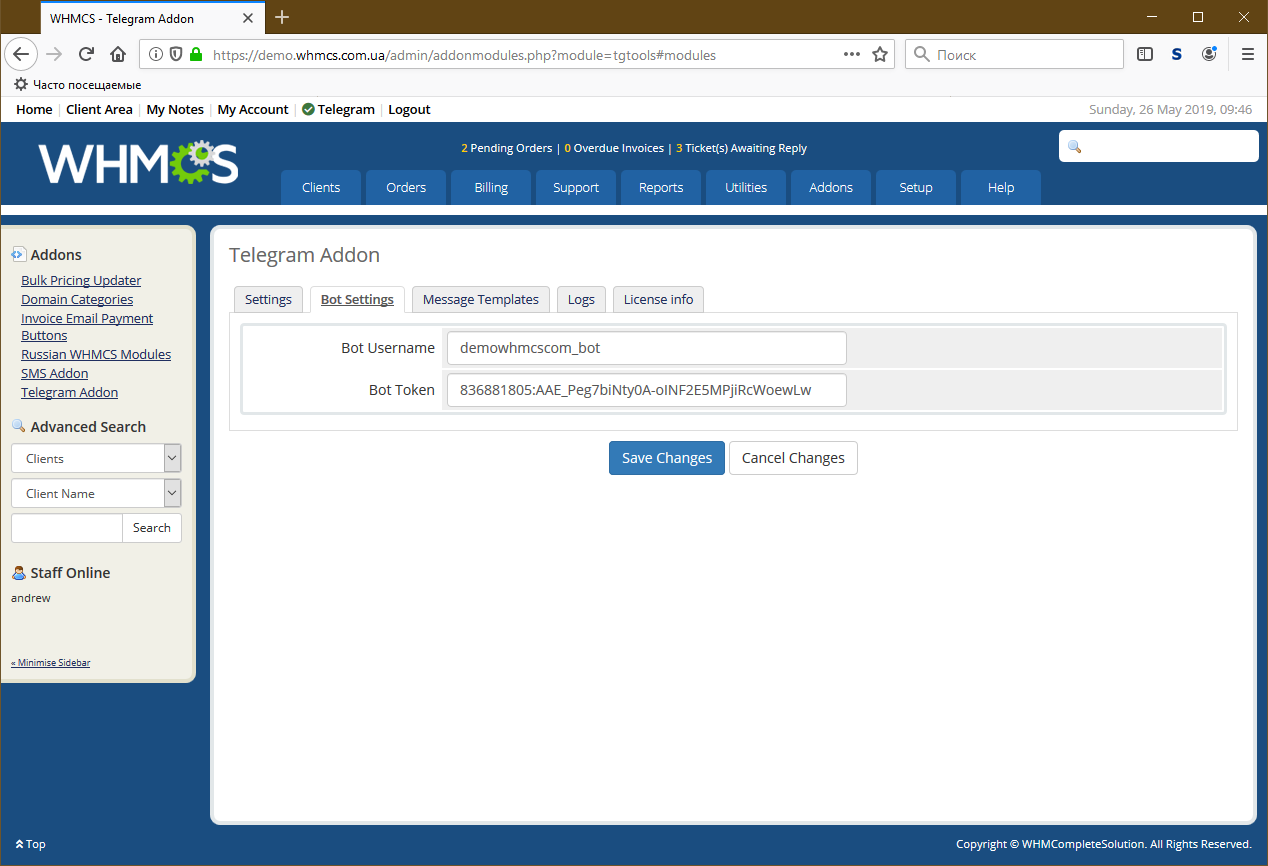
Fill Bot Username and Token in the Bot Settings tab.
Notifications
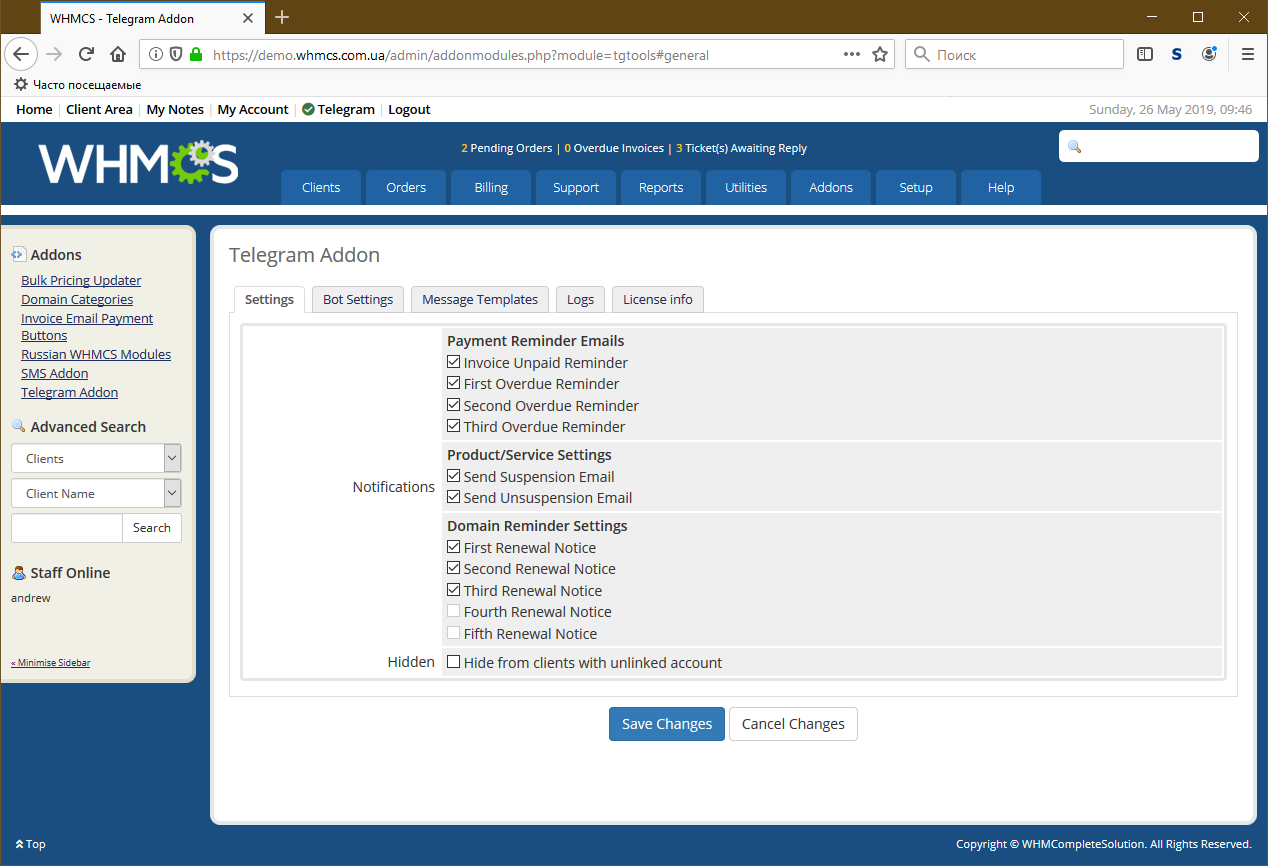
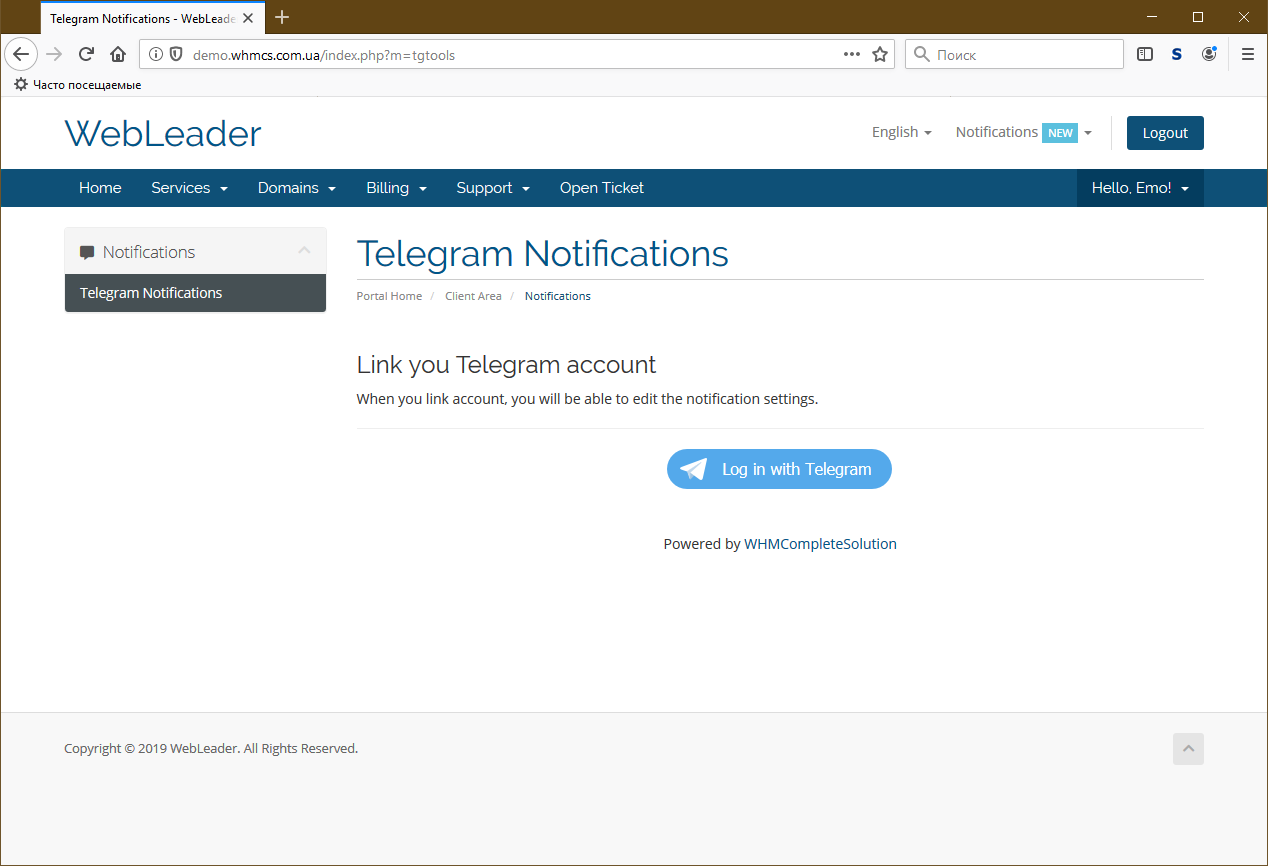
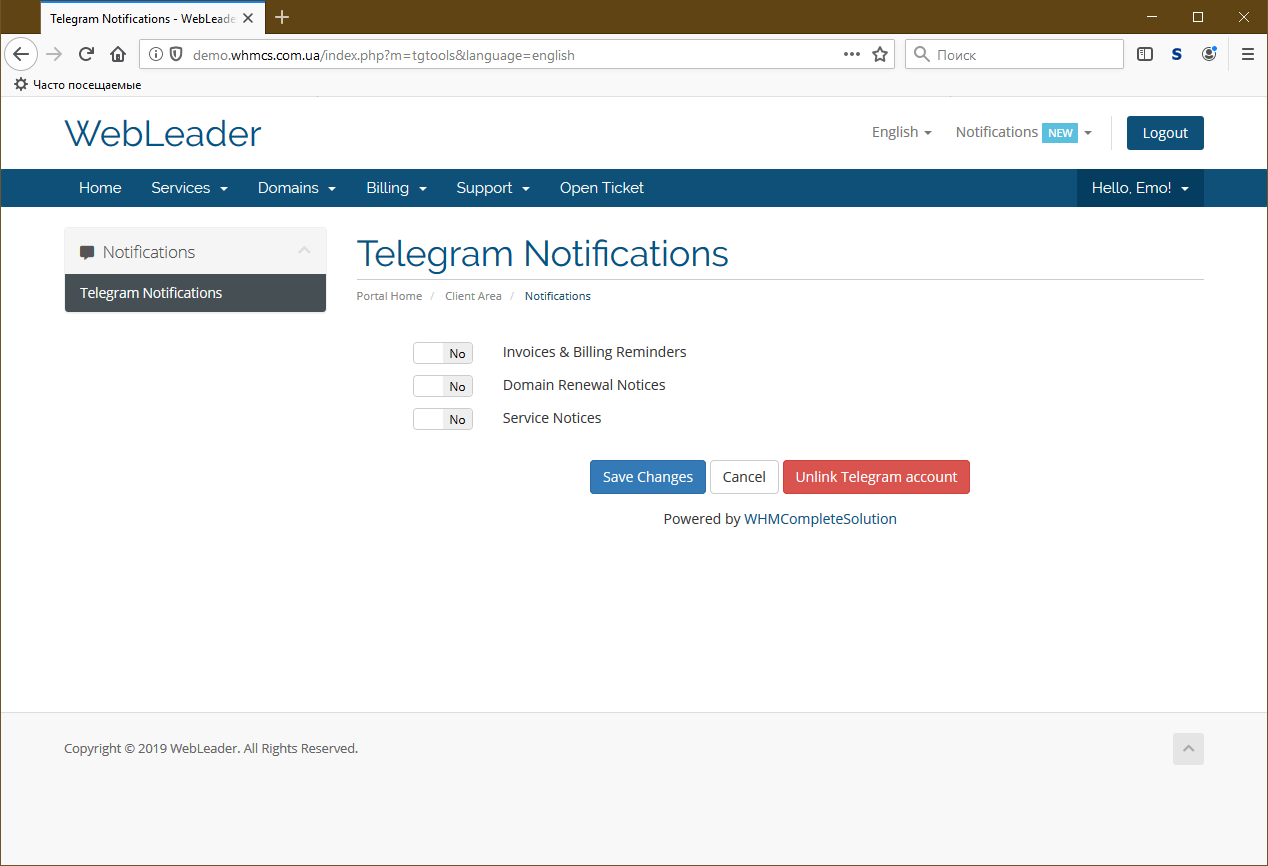
You can send different types of messages to the cleints.
Client Area:
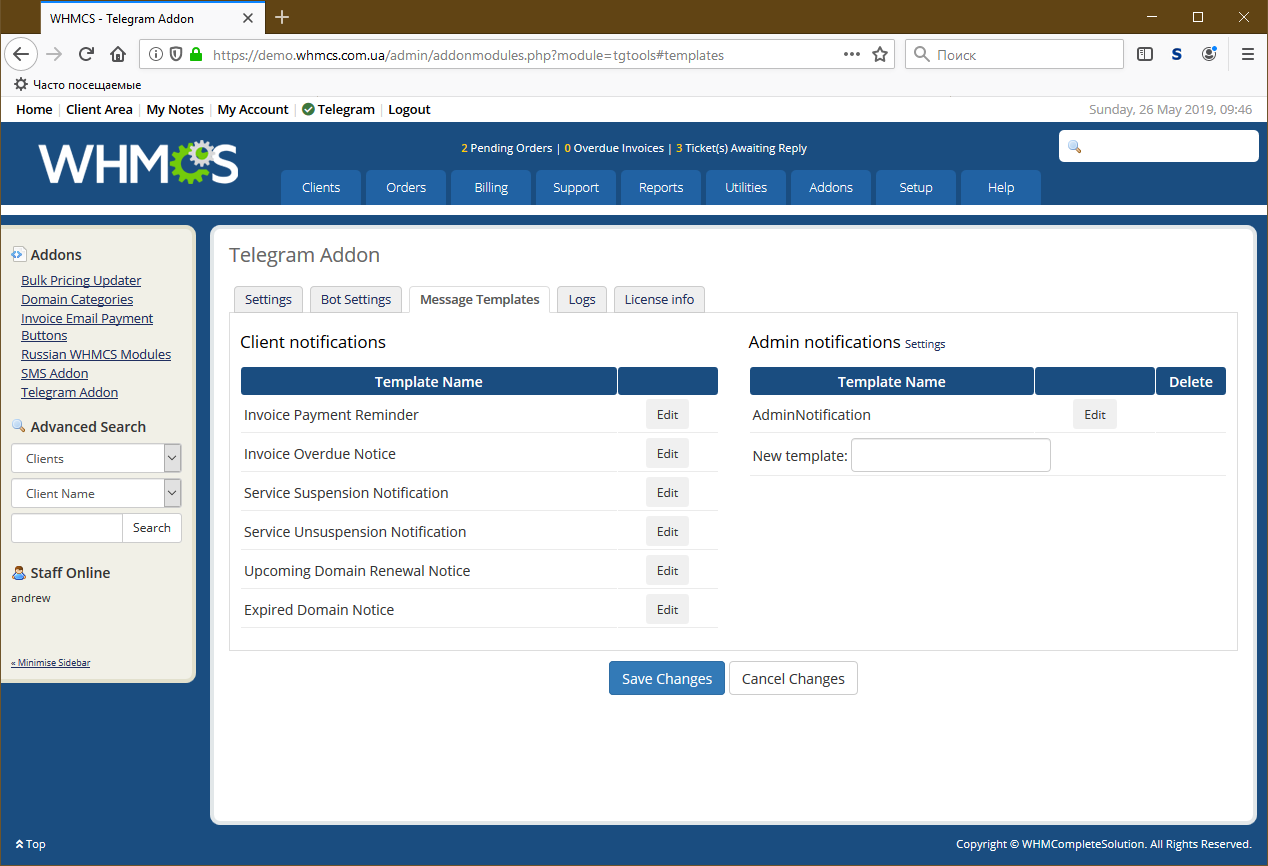
Message Templates
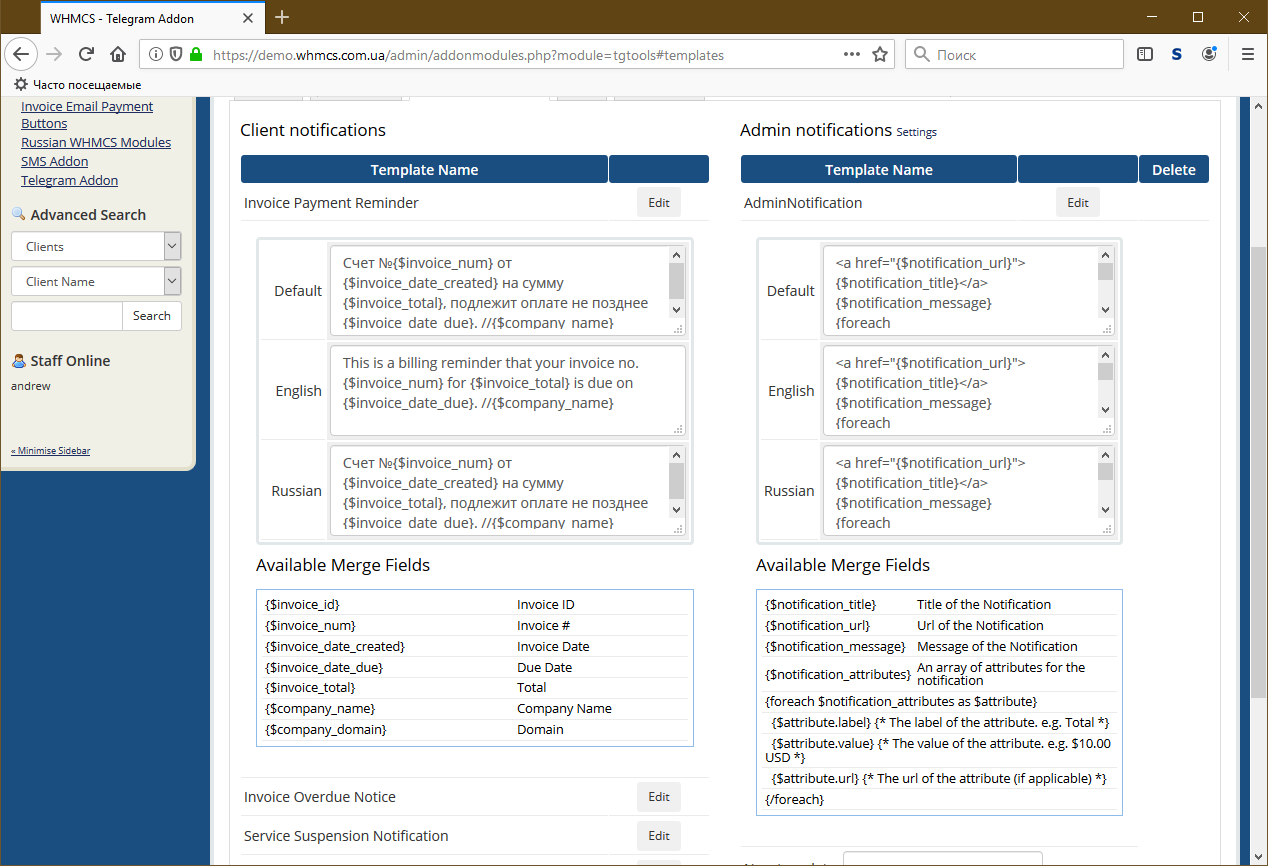
Click Edit to start editing the message. You can use Smarty variables and functions.
Also you can create custom admin templates. Several HTML tags supported
Admin Notifications
Administrators can link Telegram accounts and use it to receive notifications.
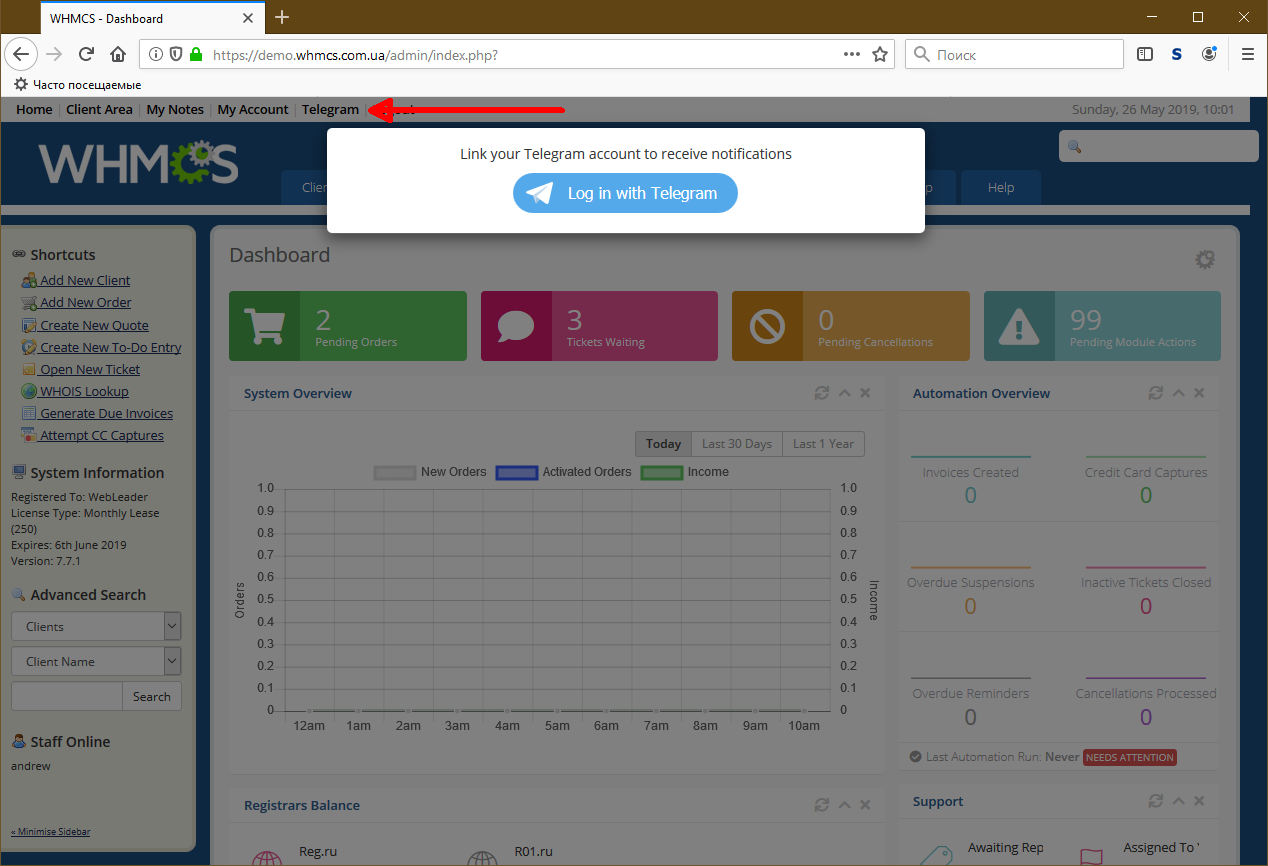
Module activation
Administrators can receive individual or group notifications.
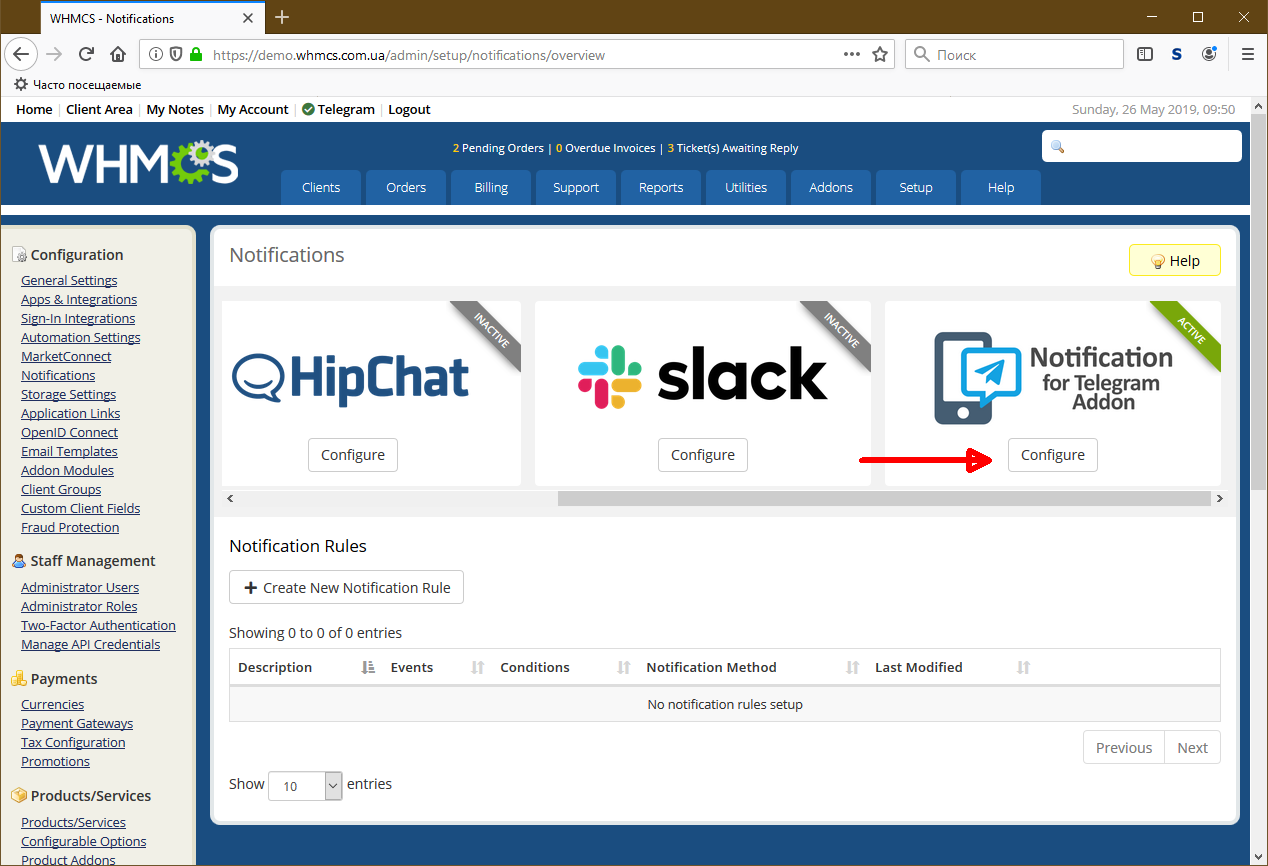
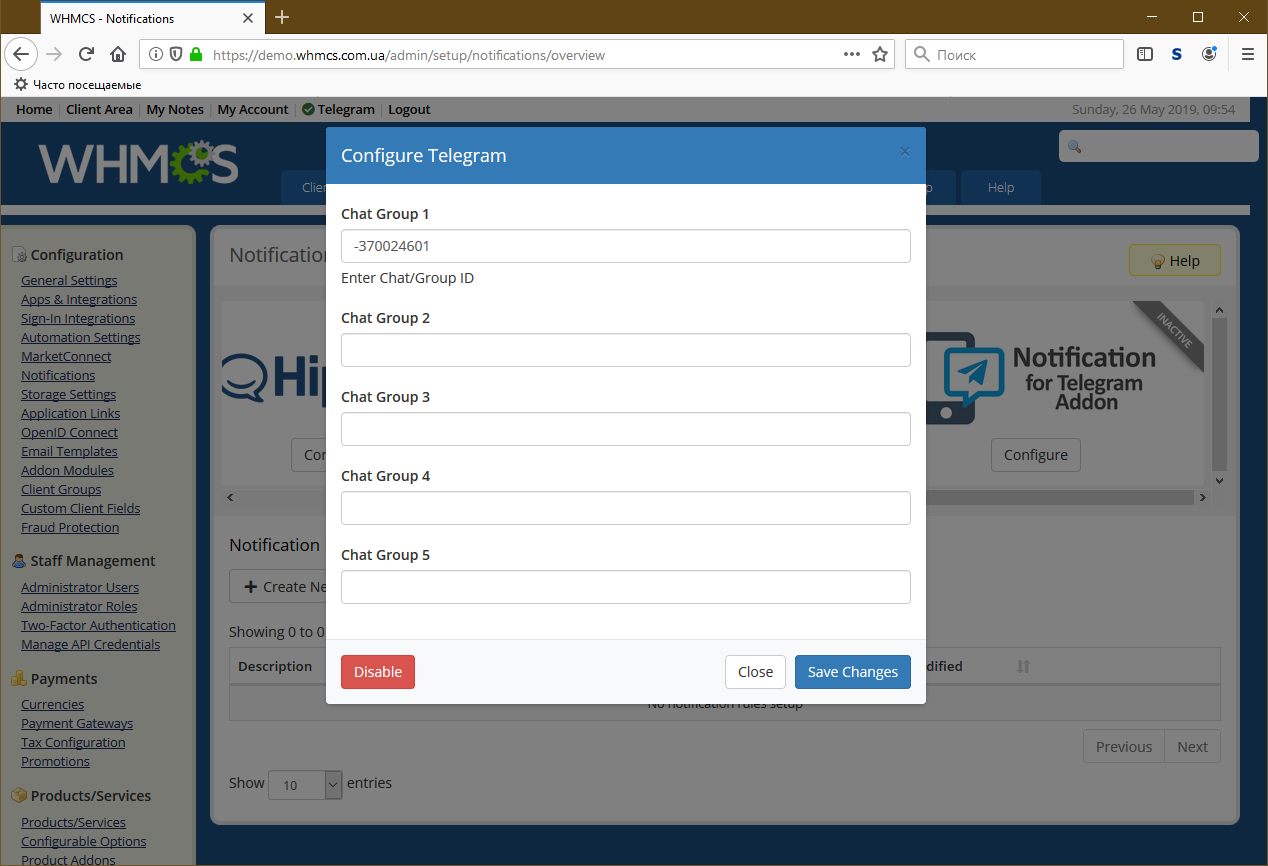
Go to Setup > Notifications click “Configure” on Notification for Telegram Addon.
You can add up to 5 Chats/Groups. To find Chat/Group ID open Telegram Web and open group info:
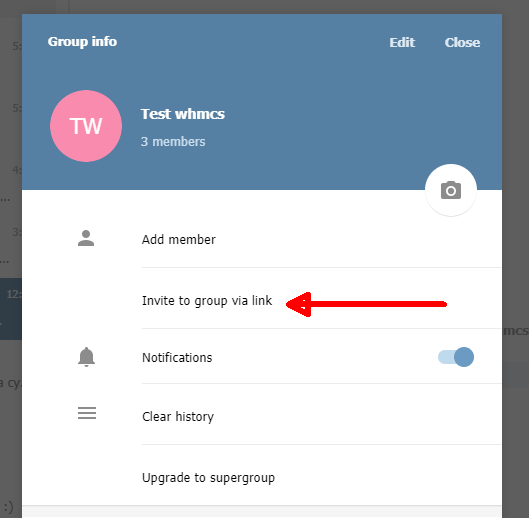
Right click on Invite to group via link and copy link. Link will be like https://web.telegram.org/#/im?p=g370024601. Numbers is group ID with ‘-‘ sign.
Creating rules
Click Create New Notification Rule for new rule:
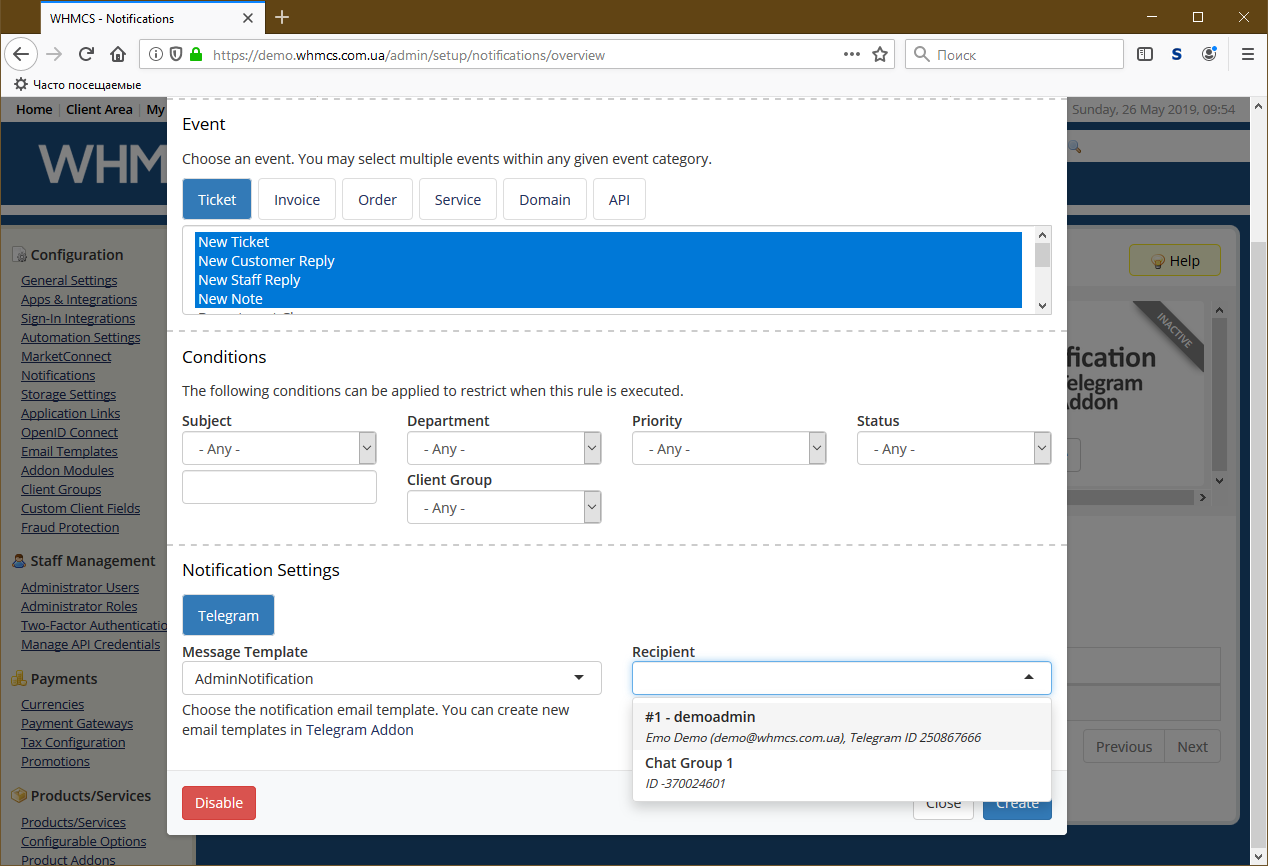
Select Message Template and Recipient.

 1 sản phẩm của Zubi Group